
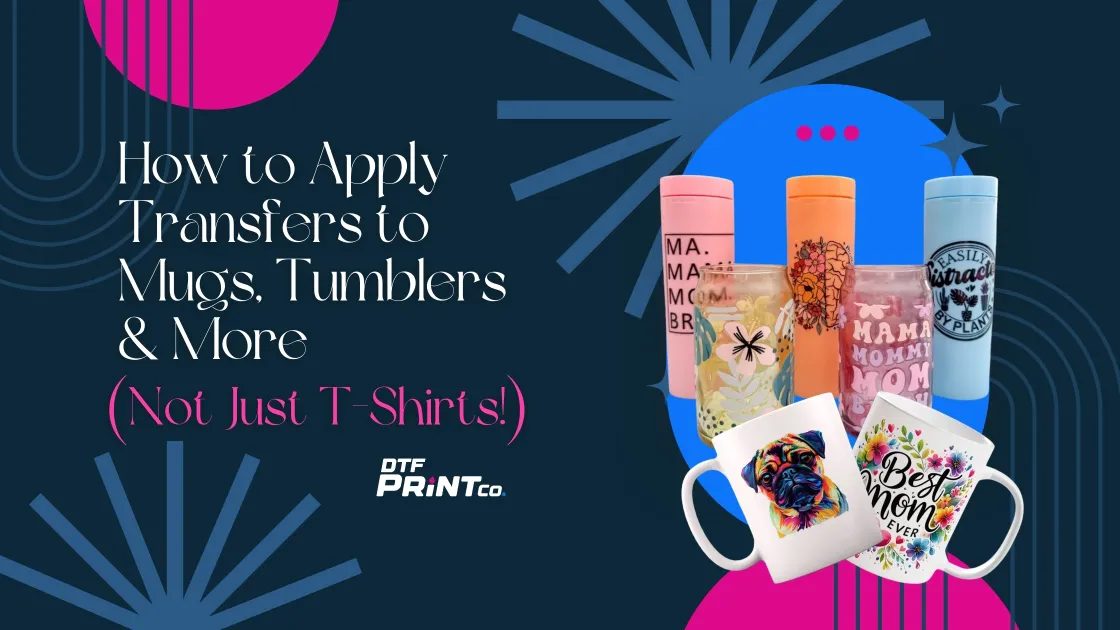
How to Apply Transfers to Mugs, Tumblers & More (Not Just T-Shirts!)
If you’re a crafter who loves designing t-shirts, mugs, tumblers, or any other personalized products, you’re in the right place. Expanding your crafting skills to mugs and other drinkware opens up a world of creative possibilities and potential profits.
Personalized mugs and tumblers make excellent gifts for birthdays, holidays, and special occasions. Plus, they’re great for business branding or as giveaways at events. But how exactly do you apply transfers to these items?
Let’s dive into the different techniques and tools you’ll need to get started!
What Types of Transfers Work on Mugs & Tumblers?
There are several transfer methods available, each with its strengths and limitations. Some work better for specific types of mugs and tumblers, so it’s important to understand which option is best suited for your project.
Sublimation Transfers – Great for White Polymer-Coated Mugs
Sublimation is the process where heat turns ink into gas, which then bonds to the surface of the item. Sublimation transfers work best on white or light-colored polymer-coated mugs and tumblers. The great thing about sublimation is that it creates a permanent, vibrant design that won’t peel or fade over time. It’s perfect for full-color designs, intricate images, or photography.
Adhesive Vinyl (Permanent) – Waterproof, Ideal for Smooth Surfaces
Adhesive vinyl is a great option for customizing mugs, tumblers, and other hard goods with smooth surfaces. It’s durable, waterproof, and resistant to fading, making it a fantastic choice for both drinkware and outdoor items. Permanent vinyl is the way to go here, as it sticks well and holds up over time. This method requires a cutting machine like a Cricut or Silhouette for precise designs.
Waterslide Decals – Used for Intricate or Full-Color Designs
If you’re working on a project that needs fine detail or full-color images, waterslide decals are the way to go. These decals work by soaking them in water and then sliding them onto the surface of your mug or tumbler. They’re perfect for those looking to create intricate, multi-colored designs. While waterslide decals work best on ceramic mugs, they can also be used on glass or metal tumblers.
DTF Transfers (Limited Use) – Usually Not Recommended but Briefly Explained
Direct-to-Film (DTF) transfers are a relatively new method in the world of heat transfers. While they are primarily designed for fabric, some crafters have experimented with using DTF on hard goods like mugs and tumblers. However, the success rate is inconsistent, and this method is generally not recommended for mugs or tumblers because the ink may not bond properly with the surface.
Tools & Materials You’ll Need
To apply transfers to mugs and tumblers, you’ll need the right tools and materials. Here’s what you’ll need based on the transfer method you choose:
Sublimation
- Sublimation printer or pre-made sublimation transfers – These printers use special ink that’s designed for sublimation. Alternatively, you can buy pre-made designs for sublimation.
- Mug heat press or convection oven – These tools are essential for applying heat to the item. A mug heat press is designed specifically for mugs and ensures even heat distribution.
- Heat tape – Used to secure the sublimation paper to the surface of the mug or tumbler to prevent movement during the press.
Vinyl
- Cricut or Silhouette machine – To cut the vinyl into your desired design.
- Transfer tape – This helps you move your vinyl design from the backing sheet to the mug or tumbler.
- Weeding tools – Used to remove excess vinyl from the design before application.
Waterslide Decals
- Waterslide decal paper – Special paper designed for waterslide decals.
- Warm water – To soak the decal and activate the adhesive.
- Clear sealer (optional) – To help the design last longer and ensure it doesn’t peel.
General Supplies
- Alcohol wipes – Used to clean the surface of your mug or tumbler before applying transfers.
- Teflon sheets or parchment paper – These help protect the design during the pressing or curing process.
- Gloves – To avoid getting oils or dirt on your items.
Step-by-Step: How to Apply Transfers to Mugs & Tumblers
Now that you have your materials ready, it’s time to get down to the process! Here’s a simple step-by-step guide for each method of transfer.
Step 1: Clean the Surface – Remove Oils or Dust
Before you start, always make sure your mugs or tumblers are clean. Use alcohol wipes or a damp cloth to remove any dust, oils, or residues from the surface. A clean surface ensures better adhesion for your transfer.
Step 2: Align the Transfer Design – Tips for Symmetry and Placement
For a professional-looking result, the placement of your design is key. Whether you’re using sublimation, vinyl, or waterslide decals, take extra care in aligning the design before applying it to your drinkware. For vinyl, use transfer tape to help with placement, and make sure the design is centered and straight. For sublimation, place your transfer exactly where you want it before applying heat.
Step 3: Apply with Proper Heat/Pressure or Adhesion
Sublimation: Use a mug press or a convection oven to apply heat to your design. The temperature should be around 380°F to 400°F, and you should press for about 3 to 4 minutes, depending on the type of mug and press you’re using. Be sure to follow the specific instructions for your mug press or oven.
Vinyl: For vinyl, you’ll need to burnish the design onto the mug or tumbler using a squeegee or other tool. Once the vinyl is securely adhered, peel the transfer tape off slowly to reveal your crisp design. This step requires some care to avoid peeling the vinyl.
Waterslide Decals: Soak the decal in warm water for about 30 seconds or until it’s ready to slide. Carefully slide the decal onto the surface of your mug, making sure it’s positioned correctly. Use a cloth to smooth out any bubbles or wrinkles as you go.
Step 4: Let it Set or Cure Properly – Time Varies by Method
Once the transfer is applied, it’s essential to let it set or cure properly.
- Sublimation: Allow the mug or tumbler to cool down for a few minutes before handling.
- Vinyl: Let the vinyl sit for at least 24 hours to ensure a strong bond before washing.
- Waterslide Decals: If you’re using a decal, you may want to apply a clear coat or sealer to protect the design. Allow the sealer to dry fully.
Common Mistakes & How to Avoid Them
Even experienced crafters can make mistakes, so here are a few common pitfalls to watch out for:
Blurry Sublimation? Mug Not Coated Properly
Sublimation transfers need a specially coated mug or tumbler for the ink to bond properly. Make sure you’re using a mug designed for sublimation, as regular ceramic mugs won’t work.
Peeling Vinyl? Used Removable Instead of Permanent
If your vinyl design is peeling off, it’s likely that you used removable vinyl instead of permanent vinyl. Always use permanent vinyl for drinkware to ensure durability.
Bubbles in Waterslide? Didn’t Smooth or Soak Long Enough
Waterslide decals need to be soaked in water for the right amount of time to slide easily. Be sure to smooth the decal carefully onto the surface to avoid air bubbles. A small brush or cloth can help remove excess water.
Transfer Design Ideas for Mugs & Drinkware
Need some inspiration for your designs? Here are a few ideas for customizing your mugs and tumblers:
- Funny quotes – A popular choice for personal gifts. Quotes that make people smile are always a hit.
- Zodiac signs – Personal and trendy, especially for custom gifts.
- Monograms – Elegant and timeless, perfect for special occasions.
- Seasonal gifts – Think Christmas, Valentine’s Day, Teacher Appreciation, etc.
- Business branding – Logo mugs make great promotional items or gifts for employees and clients.
Final Thoughts
Applying transfers to mugs, tumblers, and other hard goods can be a fun and rewarding craft. With the right tools, materials, and techniques, you can create high-quality, personalized products for yourself or to sell. Don’t be afraid to experiment and try different transfer methods until you find the best fit for your designs.
Also, don’t forget to follow the instructions for each transfer method carefully. Whether you’re making a custom mug for a friend or launching a new product line, taking the time to perfect your technique will pay off in the end. Happy crafting!
FAQs:
Can I use HTV on mugs?
Yes, HTV (Heat Transfer Vinyl) can be used on mugs, but it’s more commonly used for fabric. It’s best for flat surfaces like the front of a mug.
Do I need a mug press for sublimation?
Yes, a mug press is highly recommended for sublimation, as it applies even heat and pressure to ensure the best results. However, some crafters use a convection oven as an alternative.
How do I make vinyl on a tumbler dishwasher-safe?
To make your vinyl design dishwasher-safe, use permanent adhesive vinyl and apply a clear, dishwasher-safe sealer. Always let it cure for 24 hours before using it.
What’s the difference between waterslide and vinyl?
Vinyl is a solid material that’s cut and applied to the surface, while waterslide decals are printed designs that are transferred by soaking and sliding them onto the surface. Waterslide decals are great for intricate or full-color designs.

