
How to Use DTF Film for Hat Transfers: Complete Step-by-Step Guide
Direct-to-Film (DTF) printing has transformed custom apparel production. Known for its flexibility and vibrant results, DTF printing is now commonly used on flat garments like t-shirts. However, it also works remarkably well on complex surfaces, including headwear like caps and hats. The main appeal is its ability to transfer high-resolution images onto curved, textured materials with minimal effort and maximum quality.
Hats present a unique challenge due to their non-flat surfaces. Traditional methods like screen printing or embroidery often struggle to achieve fine detail or quick turnaround times. DTF film transfer, when done correctly, bridges that gap.
Understanding the Components of DTF Hat Transfers
What Is DTF Film?
DTF film is a specially coated polyethylene terephthalate (PET) material designed to hold ink during the printing process and release it efficiently onto a substrate. It acts as a temporary carrier for the ink and adhesive until transferred to the hat.
What Makes DTF Unique for Hats?
- Adaptability to Curved Surfaces: The DTF process easily conforms to the uneven textures and curves of caps.
- No Pretreatment Needed: Unlike DTG (Direct-to-Garment), DTF doesn’t require pretreating the surface.
- Durability: Transfers withstand repeated washing and sun exposure, important for everyday headwear.
Step-by-Step Guide: Using DTF Film on Hats
1. Prepare Your Design and Workstation
Before printing, ensure you have:
- A high-resolution digital design
- A DTF printer compatible with white ink
- Hot-melt adhesive powder
- Heat press or cap press
- A clean hat or cap (polyester, cotton, nylon, or blends)
Use vector graphics where possible, and make sure the color profile is CMYK for accuracy.
2. Print the Design on DTF Film
Using your DTF printer:
- Print your design in mirror image on the coated side of the film.
- Start with the color layer followed by a white underbase for opacity.
- Avoid smudging by ensuring the printer bed is dust-free.
The film should remain flat to ensure the ink spreads evenly. Use printer settings specific to DTF workflows—these differ from DTG or sublimation print setups.
3. Apply Hot-Melt Powder
While the ink is still wet:
- Sprinkle the powder evenly over the entire printed area.
- Shake gently to remove excess powder.
- Ensure full coverage—especially around edges and fine lines—to prevent peeling.
Use finely ground thermoplastic polyurethane (TPU) powder for better adhesion and flexibility.
4. Cure the Film
Now, cure the powder to make it tacky and ready for transfer.
- Place the film in a curing oven or use a hover heat press set to 110–120°C (230–248°F).
- Cure for 2–3 minutes until the powder looks slightly transparent or rubberized.
- Do not overcure—it can cause the film to crack or bond poorly with the hat.
Tips for Effective Curing
- Always cure in a ventilated space.
- Use a laser thermometer to verify even heat distribution.
- Label and sort your cured transfers for bulk jobs to avoid confusion.
5. Align the DTF Film on the Hat
Hats don’t have a flat print area, so alignment is key:
- Place the hat on a cap press or use a hat platen if using a standard press.
- Center the film over the desired area. Use rulers or alignment tools for precision.
- Secure the film with heat-resistant tape or magnets to prevent shifting.
For curved visors or structured hats, you may need to slit the edges of the film to allow it to flex without buckling.
6. Transfer the Design with a Heat Press
With your press heated to 140–160°C (284–320°F):
- Press for 10–15 seconds using medium pressure (approx. 40–60 psi).
- Avoid excess pressure on foam panels to prevent deformation.
- For structured caps, apply a foam insert beneath the crown for even tension.
Once pressed, let the hat cool completely before peeling. This is called a cold peel.
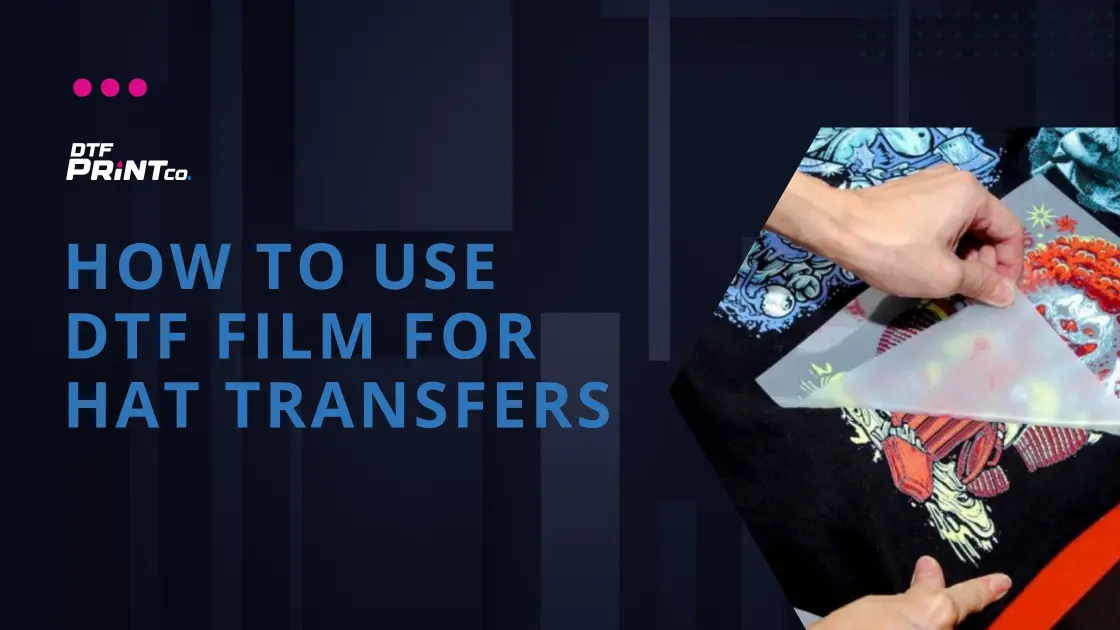
7. Peel and Post-Press
After the film has cooled:
- Peel slowly from one corner to avoid lifting fine details.
- Check for any missed edges or spots. If necessary, re-press briefly.
A final press (5–10 seconds) using parchment or a Teflon sheet increases durability. It also gives the design a smooth matte or semi-gloss finish depending on the film type.
Choosing the Right Materials for DTF Hat Transfers
Best Hat Types for DTF Transfers
- Cotton Twill Caps
- Polyester Sport Caps
- Foam Trucker Hats
- Acrylic Beanies (with caution—use low heat)
- Structured Baseball Caps
Avoid hats with waxy coatings or moisture-wicking barriers unless tested, as these can repel the adhesive layer.
Ideal Film and Powder Combinations
- Matte Films: Offer a soft finish, ideal for fashion caps.
- Glossy Films: Enhance vibrant designs, often used in promotional wear.
- Stretch TPU Powder: Adds flexibility for athletic caps or elastic bands
Maintenance and Durability
After application:
- Wait 24–48 hours before washing.
- Wash in cold water, gentle cycle, inside out.
- Air dry or tumble dry low.
Well-executed DTF hat transfers can last 50+ washes without significant fading or cracking, rivaling screen printing and embroidery in longevity.
Troubleshooting Common DTF Hat Transfer Issues
Issue: Incomplete Transfer
Symptoms: Portions of the design remain on the film or peel unevenly.
Causes and Solutions:
- Under-pressing: Increase pressure and press time slightly.
- Poor curing: Ensure the adhesive powder is fully cured; recure at correct temperature.
- Uneven contact: Use foam inserts to ensure full contact between film and hat surface.
Issue: Cracking or Peeling Over Time
Symptoms: Design cracks after washing or peels at the edges.
Causes and Solutions:
- Improper post-press: Always do a finishing press with parchment.
- Incompatible material: Avoid textured or treated fabrics that resist adhesion.
- Low-quality powder: Use reputable brands of hot melt powder rated for stretch and durability.
Issue: Color Dullness
Symptoms: Colors appear faded or not vibrant after transfer.
Causes and Solutions:
- Incorrect ink saturation: Adjust RIP settings to apply more pigment ink.
- Over-curing: Too much heat can burn pigment or glue. Stay within recommended ranges.
- Film quality: Use high-grade PET DTF film for optimal ink transfer.
Advanced Techniques to Improve Hat Transfer Quality
Use Hat-Specific Platens or Attachments
Invest in a hat press or specialized hat platen for swing-away presses. These ensure:
- Better contour matching.
- Consistent pressure.
- Faster operation in bulk setups.
Add Pre-Treatment for Complex Fabrics
For synthetic or treated hats, lightly mist a DTF pre-treatment spray. This improves adhesion on:
- Nylon caps
- Water-resistant panels
- Coated polyester blends
Always test before full application to avoid discoloration.
Multi-Zone Transfers
To apply designs on side panels or visors:
- Cut smaller DTF film sections.
- Use smaller heat press platens or handheld press tools.
- Adjust pressure and angle to avoid seam interference.
Scaling DTF Transfers for Hat Businesses
Automating Production for Bulk Orders
For medium to large orders:
- Use automated DTF shakers and curing ovens.
- Create batch transfers on gang sheets.
- Organize orders with film coding (use QR/barcode labels if needed).
Batching allows you to print dozens of cap graphics on one sheet, optimizing both material and labor.
Customization On-Demand
Offer personalized hat printing at:
- Pop-up booths
- Trade shows
- Retail storefronts
Let customers upload designs or initials. Print and cure transfers in advance, then press on-demand using a portable hat press.
Product Bundling Ideas
Combine DTF-custom hats with:
- Custom t-shirts (DTF or DTG)
- Matching tote bags or socks
- Branded packaging for e-commerce
Bundling increases average order value (AOV) and builds cohesive brand sets.
Compliance and Safety Considerations
Use Eco-Safe Inks and Powders
Ensure your materials are:
- Oeko-Tex 100 certified
- Free from phthalates, heavy metals, or harmful solvents
This is especially critical when producing kidswear or promotional products for sensitive industries.
Ventilation for Powder Curing
Curing adhesive powder releases fumes. Maintain proper airflow and filtration in your workspace. Use:
- Overhead exhaust fans
- Activated carbon filters
- Heat-resistant gloves and safety gear
Comparing DTF vs Other Hat Transfer Methods
| Method | Pros | Cons |
| DTF | High detail, universal fabrics | Requires curing, learning curve |
| Embroidery | Classic look, premium appeal | Expensive, limited to thick panels |
| Heat Transfer Vinyl | Easy for names/logos | Time-intensive, not full color |
| Sublimation | Great for polyester hats | Not compatible with cotton or darks |
DTF strikes a balance between flexibility, quality, and scalability—ideal for modern hat printing businesses.
Market Insights: Trends in Hat Customization
According to a 2024 report by Grand View Research, the global custom apparel market is valued at over \$40 billion, with headwear contributing a growing share. Embroidered and printed caps are leading categories in:
- Streetwear fashion
- Corporate gifting
- E-commerce dropshipping
DTF printing enables independent creators and small brands to enter this market without high setup costs.
(FAQs)
Can DTF transfers be used on any type of hat?
Yes. DTF transfers work on most fabrics including cotton, polyester, blends, twill, and foam. However, results may vary on treated or water-resistant materials. Testing is recommended.
Do I need a special heat press for hats?
Yes. A hat heat press or a cap platen is essential to ensure proper pressure on curved surfaces. Standard flat presses will not provide even contact.
What’s the best temperature for pressing DTF on hats?
The ideal temperature is 150–160°C (302–320°F) with firm pressure for 10–15 seconds. Always follow the DTF film and adhesive manufacturer’s specifications.
Can DTF transfers crack or peel off?
Not if applied correctly. Use a properly cured adhesive layer, cold peel technique, and post-press for durability. Cracking usually indicates poor curing or incorrect temperature settings.
How long do DTF transfers last on hats?
With proper washing and care, DTF transfers can last over 50 washes. The adhesive bond and ink hold up well under repeated wear.
Is DTF better than embroidery for hats?
DTF offers more color flexibility, faster setup, and cost-efficiency for small runs or full-color logos. Embroidery is more durable but limited in detail and color gradient support.

