
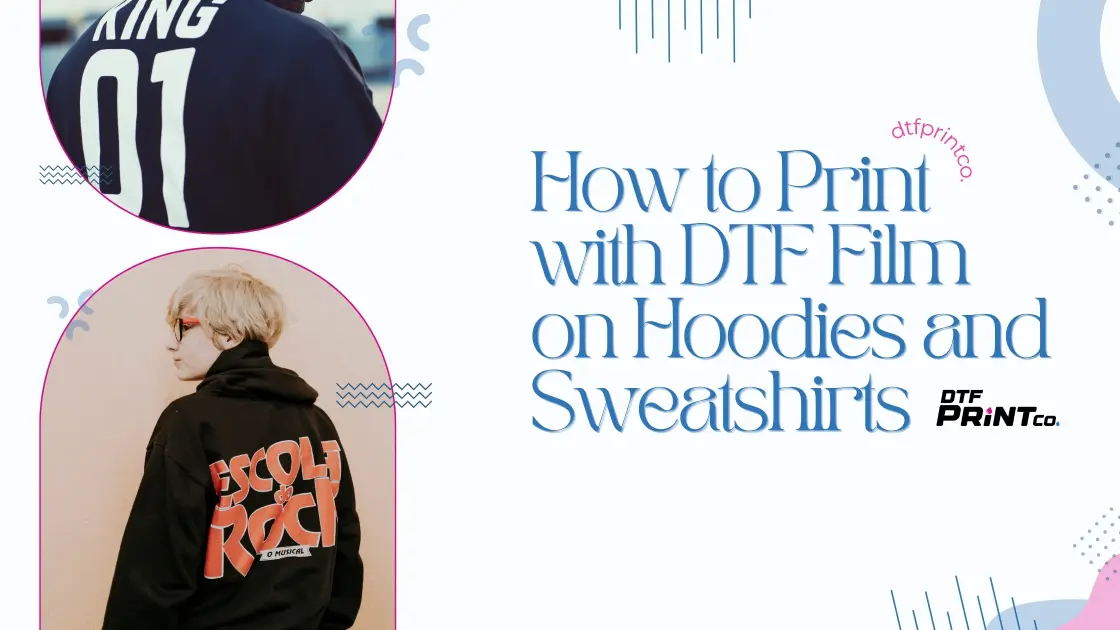
How to Print with DTF Film on Hoodies and Sweatshirts
Want to create custom hoodies and sweatshirts with vibrant, soft, and long-lasting designs? DTF printing (Direct-to-Film) is one of the best methods for small businesses, crafters, and print-on-demand sellers today. Unlike older techniques that require complex setups or expensive screens, DTF film lets you print full-color, detailed artwork directly onto fabric—without pretreatment and on any material, including polyester, cotton, and blends.
This guide will walk you through everything you need to know about how to print with DTF film on hoodies and sweatshirts. You’ll learn the tools, step-by-step process, and pro tips to get professional results—right from your home or small shop.
What Is DTF Printing and Why Use It for Hoodies?
DTF printing is a modern digital printing method that transfers a design from a special PET film to fabric using heat and adhesive. Here’s how it works:
- Print your design (in reverse) on DTF film using white and color inks.
- Sprinkle adhesive powder over the wet ink.
- Melt the powder in a curing oven or heat press.
- Press the film onto a hoodie using a heat press.
- Peel off the film—leaving behind a durable, flexible print.
Why is this great for sweatshirts? Because hoodies are thick, stretchy, and often made from mixed fabrics. Many printing methods struggle with this. DTG printing (Direct-to-Garment), for example, needs pretreatment and doesn’t work well on polyester. Heat transfer vinyl (HTV) can crack and feels stiff. But DTF prints stay soft, stretch with the fabric, and resist washing—making them perfect for hoodies.
Other benefits of DTF printing include:
- No pretreatment needed – saves time and money.
- Works on any fabric – ideal for cotton-poly blends, which are common in hoodies.
- Full-color designs – handles gradients, shadows, and fine details better than HTV.
- Cost-effective for small batches – no screen setup fees like in screen printing.
Compared to traditional methods, DTF film gives you more flexibility, better durability, and softer results—especially on textured or heavy garments like pullover hoodies and zip-up sweatshirts.
Materials and Equipment You’ll Need
To start printing with DTF film, you don’t need a factory—just a few key tools:
- DTF-compatible printer: A modified Epson L800 or L1800 with pigment inks (CMYK + white). These printers are affordable and widely used in the DTF community.
- DTF film sheets: PET-based films in 8.5” x 11” or roll format. Always store them in a cool, dry place to avoid static.
- Adhesive powder: Also called hot-melt powder, this binds the ink to the fabric. Use fine-grain powder for smooth results.
- Curing oven or heat press: To melt the powder evenly. A conveyor curing oven is best, but a heat press (with no contact) works for beginners.
- Heat press machine: Needed to transfer the film to the hoodie. Look for one with digital controls and even pressure.
- Powder shaker or dispenser: Helps apply powder evenly—avoid clumps that cause texture issues.
- Lint roller and garment prep tools: Clean the hoodie before pressing to remove dust and fiberPro Tip: Use a powder shaker with a sieve for even coverage. Too much powder can make the print stiff; too little can cause peeling.
Step-by-Step: How to Print with DTF Film on Hoodies
Now that you know the basics of DTF printing and have your tools ready, let’s walk through the full process. Printing with DTF film on hoodies and sweatshirts is simple once you get the hang of it. Follow these seven steps for consistent, high-quality results every time.
Step 1: Design Your Artwork
Your design is the foundation of a great DTF print. Start by creating or importing your artwork into design software like Adobe Illustrator, Photoshop, or free tools like Inkscape or Canva (with 300 DPI export).
Always mirror your design horizontally—this is critical because the image transfers in reverse from the DTF film to the hoodie.
For best results:
- Use vector files for crisp edges.
- If using photos or raster images, ensure they’re at least 300 DPI.
- Add a white underbase layer if printing on dark fabrics like black or navy hoodies. This ensures colors pop and stay vibrant.
Pro Tip: Test your design size on a paper cutout before printing. Place it on the hoodie to check placement—common spots include the chest, back, or pocket area.
Step 2: Print on DTF Film
Grab your DTF film sheets and load them into your modified Epson L800 or similar DTF-compatible printer. Make sure the coated side is facing down—this is where the ink sticks.
Set your printer to “T-shirt transfer” or “dark garment” mode if available. Then, print your mirrored design using CMYK + white ink. The printer will lay down the white ink first, followed by the color layers.
After printing:
- Let the film sit for 1–2 minutes to let the ink set.
- Avoid touching the printed surface—smudging can ruin the design.
- Work in a dust-free area to prevent particles from sticking to wet ink.
Actionable Tip: Always print a test design on scrap film first. This helps you check ink density, alignment, and color accuracy before using it on a real hoodie.
Step 3: Apply and Cure the Adhesive Powder
This is where DTF printing gets unique. You’ll now apply hot-melt adhesive powder over the wet ink. This powder acts like glue, bonding the ink to the fabric during heat pressing.
Use a powder shaker or powder dispenser to evenly sprinkle the adhesive powder across the entire design. A fine-mesh sieve helps prevent clumps.
Once covered:
- Gently tap off excess powder.
- Use a soft brush or small vacuum to remove loose powder—this prevents a gritty texture on your final print.
- Cure the film by melting the powder. You can use:
- A conveyor curing oven (320°F for 60–90 seconds) – best for consistency.
- A heat press with no contact (platen hovering) – budget-friendly but less even.
- Avoid hot air guns—they’re inconsistent and not recommended.
The film should look glossy and sticky after curing. Now it’s ready to press!
Step 4: Pre-Press the Hoodie
Before transferring, always pre-press your hoodie. This step removes moisture, wrinkles, and any dust that could cause bubbles or shifting.
Set your heat press to 300°F and press the print area for 5 seconds. Focus on the chest, back, or wherever your design will go.
Don’t skip this! Skipping pre-pressing is a common cause of peeling prints and uneven transfers—especially on thick sweatshirts that trap humidity.
Step 5: Transfer the DTF Film to the Hoodie
Now comes the magic. Place the cured DTF film ink-side down on the pre-pressed area of the hoodie. Use heat-resistant tape to secure the edges and prevent movement.
Cover the film with a silicone sheet or parchment paper to protect it from direct heat and prevent sticking.
Press at:
- Temperature: 300–320°F
- Time: 10–15 seconds
- Pressure: Firm and even
Use a floating platen heat press if your hoodie has seams or zippers—it adjusts to uneven surfaces.
Pro Tip: Check your heat press calibration regularly. Even a 10-degree difference can affect adhesion.
Best Practices for Flawless DTF Prints on Hoodies
Now that you’ve mastered the basic steps, let’s dive into pro tips and best practices that make the difference between a good print and a great one. Printing on hoodies and sweatshirts comes with unique challenges—thick fabric, texture, seams, and zippers. But with the right techniques, you can avoid common issues and produce durable, soft, and professional-looking designs every time.
Choose the Right Hoodie for DTF Printing
Not all hoodies are created equal. The fabric’s texture and composition play a big role in how well the DTF film adheres.
Stick to:
- Smooth-faced cotton or 50/50 cotton-polyester blends – these offer the best adhesion and clarity.
- Brands like Gildan, Bella+Canvas, Next Level, and AS Colour – known for consistent quality and DTF-friendly surfaces.
Avoid:
- Terry loop or heavy fleece fabrics – their deep texture can prevent full contact during pressing, leading to patchy transfers.
- Water-repellent or coated fabrics – these block adhesion and cause peeling.
Pro Tip: Pre-wash blank hoodies if they feel stiff. Some garments come with sizing chemicals that can interfere with ink bonding.
Avoid Common DTF Printing Mistakes
Even experienced users run into issues. Here’s how to prevent them:
- Peeling or cracking prints?
This usually means not enough adhesive powder or under-cured powder. Make sure you’re applying a thin, even layer and curing at 320°F for at least 60 seconds. - Faded or dull colors?
Check your white underbase. On dark hoodies, a weak or missing white layer makes colors look washed out. Reprint with full white coverage for vibrant results. - Bubbles or wrinkles in the print?
This is often caused by moisture or poor pressure. Always pre-press the hoodie to dry the fabric, and use firm, even pressure during transfer. - Sticky backside on the hoodie?
If the inside feels tacky, you didn’t remove excess adhesive powder before curing. Use a soft brush or small vacuum to clean the back of the film thoroughly.
Actionable Tip: Always do a test print on a scrap hoodie first. This saves materials and helps you fine-tune time, temperature, and pressure.
Hot Peel vs. Cold Peel: What’s the Difference?
After pressing, you’ll need to peel off the DTF film. But when?
- Hot peel: Remove the film immediately after pressing. Common with cheaper films. Peel slowly at a 180° angle to avoid tearing.
- Cold peel: Let the garment cool for 30–60 seconds before peeling. Often used with higher-end films and gives a cleaner, more durable finish.
Best Practice: Check your film manufacturer’s instructions. When in doubt, do a small test to see which method works best.
Boost Durability with a Post-Press
Want your DTF-printed hoodies to last longer? Try a post-press.
After peeling the film, place a parchment sheet over the design and press again at:
- 270°F
- 5 seconds
- Medium pressure
This extra step helps seal the ink into the fabric, improving wash resistance—especially important for garments that will be worn daily or sold to customers.
Not all films need this, so check your product specs. But for high-quality, long-lasting results, it’s a simple step that pays off.
Keep Your Equipment in Top Shape
A clean workspace means better prints. Over time, ink residue, powder buildup, and fabric lint can affect your results.
- Clean your heat press regularly with a soft cloth and mild cleaner.
- Store DTF film in a sealed container away from humidity to prevent static and curling.
- Calibrate your printer and heat press monthly to ensure accurate ink and temperature output.
With these DTF best practices, you’ll not only avoid headaches but also create soft, vibrant, and wash-resistant prints that stand out—whether you’re making hoodies for fun or for profit.
DTF vs. Other Printing Methods: Which Is Best for Hoodies?
When it comes to printing on hoodies and sweatshirts, you’ve got options—but not all methods are created equal. Let’s compare DTF printing with DTG, HTV, and screen printing so you can pick the best fit for your needs.
| Feature | DTF Printing | DTG Printing | HTV (Heat Transfer Vinyl) | Screen Printing |
| Fabric Compatibility | All (cotton, polyester, blends) | Mostly cotton only | All fabrics | All fabrics |
| Setup Cost | $$ (under $1,500) | $$$$ (expensive printer + pretreatment) | $ (low-cost starter kits) | $$$$ (screens, ink, labor) |
| Softness | Very soft, flexible print | Soft, but can feel thick | Stiff (unless using flock or stretch HTV) | Cracks over time |
| Design Detail | Full color, gradients, fine lines | High detail, photo-quality | Limited by cutting ability | Limited to 1–6 colors |
| Durability | 50+ washes | 20–30 washes | 30–40 washes | 50+ washes |
| Small Batch Friendly | ✅ Yes – no minimums | ✅ Yes | ✅ Yes | ❌ No – high setup cost |
Bottom Line:
If you’re running a small business, doing custom orders, or printing on mixed-fabric hoodies, DTF printing is the clear winner. It combines the softness of DTG, the affordability of HTV, and the durability of screen printing—without the high cost or limitations.
Unlike DTG, DTF doesn’t need pretreatment, works on polyester, and won’t crack on stretchy sweatshirts. Compared to HTV, it handles complex, multi-color designs without weeding or layering stress. And unlike screen printing, you can print one hoodie at a time with no setup fees.
How to Care for DTF-Printed Hoodies
You’ve put time and effort into your DTF prints—now make them last. Proper care keeps the design vibrant and flexible wash after wash.
Follow these simple steps:
- Wash inside out – protects the print from friction.
- Use cold water and a gentle cycle – heat and agitation can weaken the adhesive over time.
- Air dry or tumble dry low – high heat can damage the bond.
- Never iron directly on the design – use a cloth barrier if needed.
- Avoid bleach and fabric softener – they break down ink and adhesive.
Pro Tip: If you’re selling custom hoodies, include a care label with these instructions. It shows professionalism and helps customers keep your designs looking fresh.
With proper care, a well-printed DTF hoodie can survive 50+ washes—making it a great choice for gifts, merch, or resale.
Final Thoughts: Is DTF Right for You?
DTF printing is a game-changer for anyone who wants to create high-quality, custom hoodies and sweatshirts without the hassle of traditional methods. Whether you’re a DIY crafter, a small brand, or a print-on-demand seller, it offers:
- Lower startup costs than DTG or screen printing.
- Superior results on dark and blended fabrics.
- Soft, durable prints that customers love.
You don’t need a big space or a team—just a few key tools and the right technique.
FAQ Section
1. Can I use DTF printing on polyester hoodies?
Yes, DTF works exceptionally well on polyester and blended fabrics—unlike DTG, it doesn’t require pretreatment and adheres strongly to synthetic fibers.
2. Do I need a special printer for DTF?
Yes, you need an inkjet printer modified with pigment inks (especially white). Epson models like the L800 or L1800 are popular choices due to their MicroPiezo print heads.
3. How long do DTF prints last on sweatshirts?
With proper curing and care, DTF prints can last over 50 washes without cracking or fading—often outperforming HTV and DTG.
4. Is DTF printing cost-effective for small businesses?
Yes. DTF has low startup costs (under $1,500 for full setup) and no minimum order, making it ideal for custom, on-demand hoodie printing.
5. Can I print on dark-colored hoodies with DTF?
Absolutely. DTF uses a white ink underbase, allowing vibrant, opaque prints on black, navy, or other dark hoodies without additional steps.
6. What’s the difference between hot peel and cold peel DTF films?
Hot peel films are removed immediately after pressing and are often less expensive. Cold peel films require cooling and offer better durability and cleaner edges.
7. Can I use a regular heat press for DTF?
Yes, a standard swing-away or clamshell heat press works, but ensure it reaches 320°F and applies even pressure. Digital controls are preferred for accuracy.

