
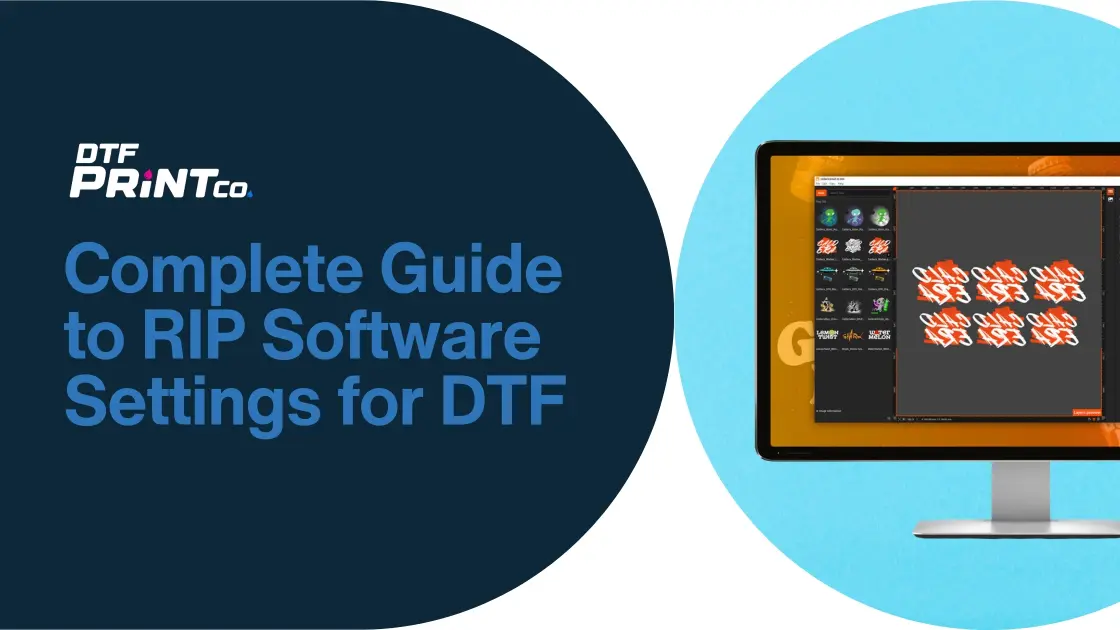
Complete Guide to RIP Software Settings for DTF
Direct-to-Film (DTF) printing has become one of the most popular methods for creating high-quality, durable designs on textiles. At the heart of this process is RIP software, which controls how your designs are printed, layered, and colored. Choosing the right settings in RIP software can make the difference between a sharp, vibrant print and one that looks faded or misaligned.
In this guide, you will learn what RIP software is, why it matters for DTF printing, and how to set it up for the best results. We’ll also cover step-by-step adjustments, common issues, and expert tips. By the end, you’ll have a clear framework for mastering RIP software settings in DTF, whether you’re a beginner or scaling up for business. For background, you can explore DTF printing basics from Printing United or review color management guides from Adobe to deepen your understanding.
What is RIP Software for DTF?
RIP software, short for Raster Image Processor, is a program that converts your digital artwork into a format your printer can understand. For DTF, it manages how the design is separated into CMYK colors and white ink layers, ensuring the print looks professional and lasts on fabric.
Unlike standard printing software, RIP software gives you control over advanced settings such as:
- Ink density and color management
- Printing order of layers (especially the white base layer)
- Dot size and placement for sharper edges
- Resolution and scaling without losing detail
In short, RIP software acts as the brain of your DTF printer, turning your design file into a precise set of instructions that optimize ink use and print quality. Without it, you risk poor color accuracy, wasted film, and lower durability in your transfers.
Understanding RIP Software Settings for DTF
When setting up DTF printing, the RIP software settings directly determine print quality, ink efficiency, and durability of the final transfer. Unlike desktop printing, DTF requires precise layering of colored inks and a white base to ensure that designs transfer cleanly onto both light and dark fabrics.
RIP software settings control:
- How colors are separated and layered
- How much ink is used in each pass
- The order in which inks are printed
- The sharpness and smoothness of edges
Getting these settings wrong can lead to dull colors, wasted materials, and customer complaints. Let’s break down the most important ones.
Ink Channel Management
In DTF printing, RIP software manages multiple ink channels:
- CMYK inks – Cyan, Magenta, Yellow, and Black for visible design colors.
- White ink – Serves as a base layer to make CMYK inks stand out, especially on dark fabrics.
Why this matters:
- On a white T-shirt, RIP may allow you to skip the white base entirely to save ink.
- On a black hoodie, RIP must lay down a strong white layer first, then print CMYK on top.
Example: If you print a neon green logo on a navy shirt without proper white underbase settings, the color will absorb into the fabric and look muted. With correct channel management, the neon green stays bright and crisp.
Color Profiles and ICC Management
Color management is another key role of RIP software. ICC profiles are like translators between your design file and your printer. They make sure the colors on your screen match the colors on the garment.
- Correct ICC profile = predictable, consistent prints.
- Wrong ICC profile = off-shade colors, unhappy customers.
Practical Tip:
If your brand uses a signature shade of blue, load the correct ICC profile for your DTF printer to avoid mismatched tones.
Some RIP solutions like CADlink Digital Factory and Acrorip include preset ICC profiles for popular printer models. For more technical users, you can create custom ICC profiles using a spectrophotometer.
Learn more from the International Color Consortium.
Resolution and DPI Settings
Resolution is measured in dots per inch (DPI) and controls how detailed your prints appear.
- 300 DPI – Standard resolution for bold text and simple logos.
- 600 DPI – Balance of detail and speed for most apparel prints.
- 1200 DPI – Ultra-fine resolution for photographic images or small lettering.
Key Insight:
- Higher DPI increases ink use and slows down printing.
- Lower DPI speeds things up but risks jagged edges on detailed artwork.
Example: A shop printing event T-shirts in bulk might use 600 DPI to balance speed and quality. A shop printing custom sports jerseys with player photos might choose 1200 DPI for maximum clarity.
Ink Density and Droplet Size
Ink density defines how much ink is deposited per pass. Droplet size determines how smooth or textured the ink layer looks.
- High density – Ensures solid coverage on dark fabrics but risks oversaturation.
- Medium density – A safe balance for most designs.
- Low density – Saves ink but can cause faded prints.
Droplet size is equally important:
- Small droplets – Best for smooth gradients and photo-realistic images.
- Large droplets – Faster production for bold graphics.
Example: A high-resolution photograph on a DTF transfer benefits from small droplets with medium density. A bold white company logo may look perfect with larger droplets and higher density.
White Layer Settings
The white underbase is the foundation of every DTF print. RIP software allows you to fine-tune how it’s applied.
- Opacity Control – Decide how strong or light the white base is.
- Choke/Spread Adjustments – Shrinks (choke) or expands (spread) the white base slightly to ensure no white edges peek out.
- Print Order – Ensures white ink prints before CMYK inks.
Common Issues and Fixes:
- Problem: White ink cracks after heat pressing. Fix: Reduce white layer opacity to avoid excess thickness.
- Problem: Faint halo of white around design edges. Fix: Apply choke of –0.2 mm in RIP software.
Example: Printing a full-color graphic on a red hoodie? Set white opacity to 100%, apply a –0.2 mm choke, and print in the order White → CMYK for sharp results.
Print Order and Pass Control
Most RIP software lets you choose between single-pass and multi-pass printing:
- Single-pass printing: Prints white and CMYK inks in one pass — faster, but sometimes less precise.
- Multi-pass printing: Prints white first, then CMYK — slower, but ensures better registration and durability.
Example: For bulk runs of basic logos, single-pass is efficient. For detailed graphics with gradients, multi-pass ensures cleaner results.
Example: Common RIP Settings for a Dark Shirt Print
| Setting | Recommended Value | Purpose |
| Resolution (DPI) | 600 | Sharp edges with good ink efficiency |
| White Underbase | 80–100% opacity | Ensures colors pop on dark fabric |
| Ink Density | Medium–High (balanced) | Avoids over-inking and smudging |
| Droplet Size | Medium–Small | Maintains smooth gradients |
| Choke Adjustment | –0.2 mm | Prevents white layer showing at edges |
| Print Order | White → CMYK | Correct layering for durability |
By mastering these settings, print shops can balance quality, cost, and production speed, leading to fewer wasted transfers and happier customers.
Optimizing RIP Software Settings for Better DTF Results
Understanding RIP software is one thing — but applying it effectively in daily production is where most shops succeed or fail. Optimized settings not only improve print quality but also reduce ink waste, speed up turnaround, and ensure customer satisfaction. This section covers practical strategies, common troubleshooting, and advanced workflows that real businesses use to maximize their DTF output.
Fine-Tuning Color Accuracy
Even with the right ICC profile, printers sometimes output colors that do not match what you see on screen. This is especially common with skin tones, brand colors, or gradients.
How to fix this:
- Use a calibrated monitor: If your display isn’t color-accurate, your print will never match what you see. Devices like the Datacolor Spyder can help.
- Print test swatches: Before committing to a 100-piece run, print a small strip of color samples to confirm accuracy.
- Adjust color curves: In RIP software, you can increase or decrease specific color channels. For instance, lowering magenta levels slightly can correct reddish skin tones.
- Check fabric influence: Different fabrics absorb colors differently. Cotton may mute colors compared to polyester, so test on the actual fabric type.
Case example: A sportswear brand wanted consistent neon orange logos. By creating a custom ICC profile and adjusting the color curve for orange, the shop achieved perfect brand matching across cotton and polyester garments.
Balancing Speed vs. Quality
Every print shop faces the challenge of balancing production volume with image quality. High resolution and multiple passes create beautiful prints, but they also slow down workflows.
Best practices:
- For bulk orders of text-based designs, stick with 600 DPI, larger droplets, and medium density to maximize speed.
- For photo-realistic designs or small lettering, increase to 1200 DPI, small droplets, and multi-pass printing.
- Save preset profiles in RIP software labeled “High Detail” or “Fast Production” so operators can switch quickly.
Production tip: Use single-pass printing for promotional tees and multi-pass for high-end fashion pieces where detail matters.
Managing White Ink Consumption
White ink is often the largest ongoing expense in DTF printing. Optimizing white underbase settings can cut costs by 15–30% without compromising quality.
Methods to reduce waste:
- Lower opacity for lighter fabrics: A 60–70% white base is often sufficient on light gray or pastel shirts.
- Choke settings: Shrink the white layer slightly to prevent unnecessary ink spread.
- Knockout technique: Remove white ink under areas of solid color (such as black text) where it isn’t needed.
- Layer thickness control: Instead of applying one very dense pass of white, try two lighter passes for faster curing.
Business impact: One mid-sized shop reduced white ink use by 25% per month simply by lowering opacity from 100% to 85% and using knockout settings for designs with large black areas.
Preventing Common Printing Issues
Even with correct setup, print problems occur. RIP adjustments can fix most of them.
Banding or horizontal lines
- Cause: Low resolution, clogged nozzles, or misaligned print head.
- Fix: Increase DPI, run head cleaning, or use multi-pass printing.
Washed-out or faded colors
- Cause: Weak white layer or low ink density.
- Fix: Increase white opacity to at least 80% and raise CMYK density slightly.
White halo around edges
- Cause: White underbase misaligned with CMYK print.
- Fix: Apply choke (–0.2 to –0.3 mm) to shrink the white layer.
Smudging or long drying times
- Cause: Too much ink or low curing temperature.
- Fix: Lower ink density in RIP or increase curing temp by 5–10°C.
Blurry small text
- Cause: Resolution too low or droplet size too large.
- Fix: Use 1200 DPI and smaller droplets for fine lettering.
Keeping a troubleshooting checklist in the print room helps operators solve these problems quickly without wasting material.
Workflow Tips for Efficient Printing
Efficiency is just as important as print quality. Small workflow changes in RIP software can save hours each week.
- Save presets: Create standard profiles for common materials like “Black Cotton Hoodie” or “Polyester Sports Shirt.”
- Batch print jobs: Group similar designs to avoid switching settings repeatedly.
- Preview prints: Always use the RIP preview function to check alignment, ink usage, and layering before sending to the printer.
- Log successful settings: Keep a notebook or spreadsheet documenting which configurations worked best for different fabrics and inks.
- Update software regularly: Manufacturers release patches to fix bugs and improve ink handling.
Professional shops often designate one team member as a “RIP technician” responsible for maintaining presets and training others.
Advanced Insights for Professionals
Once you have mastered the basics, RIP software offers advanced tools to gain a competitive edge.
- Layer sequencing: Some RIPs allow printing CMYK first, then white (reverse order), for metallic or textured effects.
- Custom ICC profiles per fabric: Polyester, cotton, blends, and treated fabrics all absorb ink differently. A tailored ICC profile for each improves consistency.
- Halftone control: Adjust halftone dot shapes and patterns to enhance gradients and prevent blotching.
- Overprint vs. knockout: Overprint applies new colors over existing ones for depth, while knockout removes background areas to save ink and avoid buildup.
- Variable dot control: Advanced RIPs allow precise control over droplet size within the same print for smoother transitions.
These techniques require more experimentation but can set your business apart by delivering effects competitors can’t match.
Case Example: Small Business Optimization
A custom apparel shop printing about 200 shirts weekly noticed rising ink costs and inconsistent colors across fabric types. After auditing their RIP setup, they made three changes:
- Reduced white opacity from 100% to 80% for mid-tone fabrics.
- Applied choke at –0.2 mm to prevent halos around logos.
- Standardized resolution at 600 DPI for everyday prints and reserved 1200 DPI only for high-detail jobs.
Results:
- White ink usage dropped by 20% monthly.
- Customer complaints about halos decreased to zero.
- Average production time per shirt decreased by 15%.
This example shows how small adjustments in RIP software can deliver big improvements in profitability and customer satisfaction.
Pros and Cons of Using RIP Software for DTF
Like any tool, RIP software has strengths and weaknesses. Knowing both helps you make better business decisions.
Advantages
- Precise color management: Ensures accurate brand colors and photo-quality results.
- Control over white ink layers: Essential for vibrant prints on dark fabrics.
- Customizability: Settings can be adjusted for different fabrics, designs, and workflows.
- Improved efficiency: Presets and batch settings save time in production.
- Scalability: Suitable for both small businesses and large-scale production.
Limitations
- Learning curve: Beginners may find the settings complex.
- Software cost: Professional RIP programs can be expensive.
- Ink waste during setup: Trial and error is often needed to find ideal settings.
- Hardware dependency: Not all RIPs are optimized for every printer brand.
For many shops, the benefits outweigh the drawbacks, especially once operators become comfortable with the software.
Real-Life Example: Enterprise-Level Use
A mid-sized apparel manufacturer printing over 1,000 garments per week switched from generic printer drivers to a professional RIP solution (CADlink Digital Factory). They reported:
- 25% reduction in ink waste thanks to optimized density and white base controls.
- Faster turnaround times, with batch presets cutting setup time by 30%.
- Improved consistency across multiple printers, ensuring the same design looked identical on every garment.
This case illustrates how RIP software becomes a profit driver, not just a technical necessity, when scaled correctly.
Frequently Asked Questions About RIP Software Settings for DTF
- What is RIP software in DTF printing? RIP software is a program that converts your artwork into printer instructions, controlling colors, ink density, resolution, and layering for accurate and durable DTF transfers.
- Do I always need a white underbase when using RIP software for DTF? Not always. White underbases are required for dark or colored fabrics, but they can be reduced or skipped for light-colored garments to save ink.
- What DPI should I use for DTF printing? Most shops use 600 DPI for standard jobs. Use 1200 DPI only for very detailed or photographic prints. Lower DPI speeds up production but reduces fine detail.
- How do I reduce white ink usage in RIP software? Lower the opacity (60–80% for lighter fabrics), apply choke to reduce excess coverage, and use knockout settings to remove unnecessary underbases.
- Why are my DTF prints showing banding or lines? This usually happens due to low resolution, clogged nozzles, or improper droplet size. Increasing DPI, cleaning print heads, or adjusting droplet control often fixes it.
Summary and Final Thoughts
RIP software is the engine that powers DTF printing success. It controls color accuracy, resolution, ink density, and white layering, ensuring prints look professional and last through washes. By mastering RIP settings, you can:
- Improve print quality with sharper details and vibrant colors.
- Reduce ink costs by optimizing white layers and density.
- Increase production efficiency with presets and batch workflows.
- Deliver consistent results across different fabrics and large orders.
Whether you’re just starting with DTF or running a high-volume shop, learning RIP software is one of the most valuable skills you can develop.

