The Difference Between Hot Peel and Cold Peel DTF Film
Direct To Film (DTF) printing is rapidly becoming a popular choice for custom apparel and garment decoration. Unlike traditional screen printing or direct-to-garment (DTG) methods,

Hot peel DTF (Direct-to-Film) transfers are making waves in the custom printing world, and for good reason. They’re quick, versatile, and capable of producing vibrant, high-quality designs. But as with any process, maximizing efficiency is key to getting the most out of your efforts. Whether you’re a seasoned pro or just starting out, small tweaks in your workflow can lead to big payoffs.
In this guide, we’ll cover the best practices for using hot peel DTF transfers. From prepping your designs to finishing the final product, you’ll get actionable tips that not only save time but also ensure amazing results. Let’s jump in!
Before we talk about efficiency, it’s crucial to appreciate why hot peel DTF transfers are so popular. Unlike traditional techniques like screen printing or vinyl, hot peel DTF has a few key advantages:
All these benefits make hot peel DTF transfers a go-to method, but to truly shine, you’ll want to adopt strategies to maximize your efficiency. Here’s how.
Every successful project begins with proper prep work. A little time spent preparing can save you hours of frustration down the line.
Starting with a great design isn’t just about aesthetics—it’s about functionality. DTF prints love high-quality, bold graphics with clean lines and lots of contrast. Avoid overcomplicated designs with minute details that might get lost during the transfer process.
If your design includes text, ensure that the font sizes are legible on the chosen substrate, and always double-check for typos (trust me, nothing’s worse than realizing after the fact your shirt says “Gradduation Party”).
Printer performance is crucial when it comes to producing stunning DTF prints. Every DTF printer and RIP software will have its quirks, but general settings for vibrant and durable output include:
Efficient workflows thrive on having everything ready when you need it. Before starting, check that you have:
It’s also smart to lay out your work area with all your tools within arm’s reach so you’re not running back and forth.
Your heat press is the backbone of DTF transfers. Getting the temperature, pressure, and timing just right is critical for efficiency and results.
Hot peel DTF usually calls for 300–320°F (150–160°C) and medium to firm pressure, but always consult the manufacturer’s instructions for the materials you’re using.
Too much heat or not enough pressure? Your design might partially transfer, which wastes time and materials. That’s why testing every new batch with a scrap piece is worth it.
Most hot peel DTF transfers only need 10–15 seconds in the heat press. If this isn’t embedded in your muscle memory yet, set timers during the process to avoid overcooking your prints. Overexposure can lead to burnt colors or weakened adhesion.
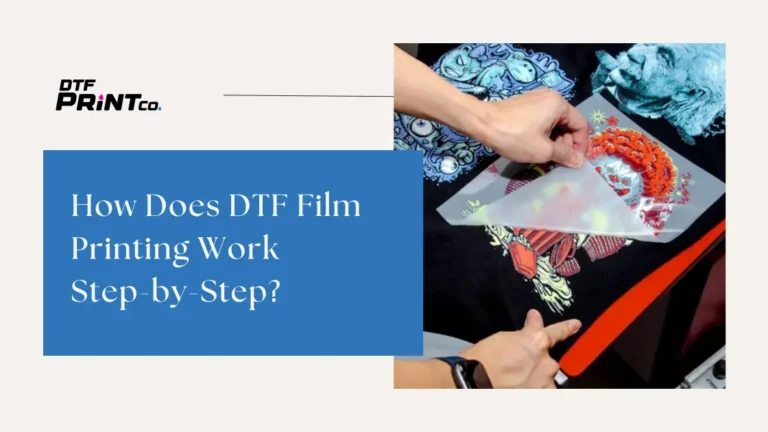
Here’s where the “hot peel” comes into play. Once the heat press timer beeps, work fast! Peel the transfer film off smoothly while it’s still hot. If the film cools too much, the design might not release as cleanly, causing jagged edges or tugging up parts of the print.
Pro Tip: Some folks like to start peeling at one corner to get the rolling motion going—it’s quicker and less risky than a full-on tug.
When you’re working with multiple designs, managing your time becomes even more important. Efficient workflows not only get the job done faster but also reduce the chance of errors.
Printing, powdering, and pressing individual designs one by one can stretch your project timeline unnecessarily. Instead, try batching your tasks:
This method keeps you moving consistently without wasting time switching between tasks.
If you’re working on bulk orders, uniformity matters. Avoid the tedious guesswork by creating templates or jigs that center your designs perfectly on every shirt. It saves time, boosts consistency, and keeps customers coming back for that flawless look.
| Step | Best Practice |
| Preparing Designs | Ensure high-quality resolution (300 dpi); keep text legible. |
| Printing | Batch designs in RIP software to print several at once. |
| Powder Application | Sprinkle adhesive evenly; shake off any excess for clean results. |
| Heat Pressing | Use consistent pressure; peel hot and smoothly for a polished finish. |
Hot peel DTF transfers aren’t without their challenges. Here’s how to overcome some of the most common hurdles:
If you find yourself repeatedly running into the same issues, take notes or even keep a log. Sometimes, troubleshooting comes down to identifying patterns.
Your work doesn’t end once the design is transferred! Setting up proper care instructions makes all the difference for customer satisfaction.
Include specific washing recommendations for customers:
This will ensure designs hold up beautifully for years, building trust in your work.
Before shipping or delivering your products, do a quality check on each item. Look for any peeling edges, color variations, or pressure-related defects. Catching these early will save you headaches later—and keep your customers happy.
When I first started with hot peel DTF transfers, I assumed the fast peeling process meant I could rush through everything. Spoiler alert—it didn’t. I ruined a few designs by applying uneven pressure on the heat press or peeling too aggressively. Lesson learned! Efficiency doesn’t mean speed alone; it means control and consistency. Once I fine-tuned my workflow, I found that I could tackle larger orders with less waste and stress.
Hot peel DTF transfers are one of the fastest ways to create stunning prints, but to truly maximize efficiency, it’s crucial to work smarter, not harder. By preparing ahead, optimizing your setup, and continuously refining your processes, you’ll save time, cut costs, and elevate the quality of your custom prints.
Remember, it’s all about creating a system that works for you. These tips should act as a starting point, but don’t be afraid to experiment. The better your workflow, the happier both you and your customers will be. Now, go set that heat press to work and watch the magic happen!
For optimal results, set your heat press to a temperature of 300–320°F (150–160°C) and apply medium to firm pressure. Always refer to the material’s manufacturer guidelines as some fabrics or films may have slight variations.
Why is my design peeling up with the film?
This issue often occurs when the film cools down too much before peeling. Hot peel transfers need to be removed smoothly while still warm to avoid jagged edges or incomplete transfers. Ensure you’re peeling immediately after pressing.
How do I ensure vibrant and durable prints?
Use a proper ink balance (starting with CMYK first, then a layer of white), apply adhesive powder evenly, and maintain consistent heat press settings. Additionally, use high-quality DTF film and inks for the best results.
Can I reuse the same DTF film for multiple transfers?
No, DTF film is designed for single-use only. Reusing it can result in poor quality transfers, as the film won’t retain the same adhesion or clarity after the first application.
How do I prevent smudging during the printing stage?
Smudging can happen if there’s too much ink deposited on the film. Double-check your printer settings for the correct ink density and ensure your printer resolution is set to 1440 dpi to minimize excess ink buildup.

Direct To Film (DTF) printing is rapidly becoming a popular choice for custom apparel and garment decoration. Unlike traditional screen printing or direct-to-garment (DTG) methods,

If you’ve ever dreamed of creating your own custom shirts, hoodies, or tote bags without spending a fortune or dealing with messy screens, there’s some

If you’re looking to start or grow a custom apparel business, you’ve probably heard about DTF film and sublimation printing. These are two of the

2023 - 2024 © ALL RIGHTS RESERVED